Starting a bathroom remodel can feel overwhelming, yet it becomes far more manageable with a clear plan. This guide outlines the steps taken by homeowners and professionals alike in the United States. You’ll learn how to define the project scope, set a budget, and organize the work from demolition through the final hookups.
Explore Bathroom Renovation Services in Maple Valley, WA
You should plan for unexpected issues, including delayed glass enclosures, concealed rot under the floor, and changes that impact plumbing or electrical work. The choice of brands and materials is critical. Consider Schluter® tile trim, RedGard waterproofing membrane, Hansgrohe faucets, and Woodbridge toilets when selecting your fixtures.
Before contacting contractors, sketch out your ideal layout. Prioritize the acquisition of long-lead items such as vanities and specialty stone. Plan ahead for temporary bathroom access as well, whether that means a shower or toilet setup. For those who prefer a contractor-managed approach, Renovate Builders offers oversight to minimize costly rework and structural surprises.
Important Takeaways
- Begin with a clear scope so the bathroom renovation stays focused and scope creep is avoided.
- Buy long-lead products such as vanities, glass, and specialty stone as early as possible.
- Follow a logical sequence—demolition → rough-ins → finishes → final connections—for a smoother process.
- Expect concealed damage during demolition and include a budget contingency for it.
- Choose trusted brands like Hansgrohe and Schluter® for reliable fixtures and systems.
Planning Your Bathroom Renovation: Goals, Budget, And Schedule
A clear plan is essential before any work begins. Decide how you want the bathroom to feel and function. Save photos of designs you like, especially ones that highlight finishes, storage solutions, and accessibility features. Decide whether the project is a full remodel, a spa-inspired upgrade, or a more modest update with fresh paint and a new vanity.
Create a basic floor plan to evaluate whether your ideas are practical. Those early sketches help contractors spot structural limits, plumbing needs, and joist strength for heavier fixtures like a soaking tub. Homes with age may come with uneven floors or sloped ceilings, and those factors can affect the schedule and budget. Give your contractor the plans and measurements so they can prepare a more realistic estimate.
Establish a budget with a 10–20 percent contingency for unexpected expenses. Pinpoint major cost drivers like plumbing changes, tile work, custom stone, and glass enclosures. For a ballpark figure, look at comparable projects and factor in local labor pricing.
Order essential items like vanities, glass shower doors, and specialty stone early to avoid delays. It is common for homeowners to face multi-week waits for custom glass and stone. Planning ahead helps keep the timeline tighter and costs more controlled.
Build a timeline with clear milestones, including demolition, rough-ins, insulation and drywall, tile and glazing, and the final installs. Schedule inspections strategically, as they often precede insulation and drywall. Leave extra days in the schedule for deliveries and permit-related approvals.
Make a plan for temporary bathroom use during the renovation. Options include borrowing a nearby shower, setting up a temporary solution, or sequencing the work to keep one bathroom available. Talk through these arrangements with your contractor so the work can be sequenced more effectively.
Visit showrooms like Fitzgerald Tile to see tile samples and grout options in person. Check salvage yards and stone yards for leftover materials if you want to reduce costs. These steps, combined with your research, will help maintain your style and budget.
When your goals, budget, and timeline are clear, every trade has better direction. It helps limit surprises, improves scheduling efficiency, and keeps the remodel aligned with your design goals.
How To Renovate A Bathroom
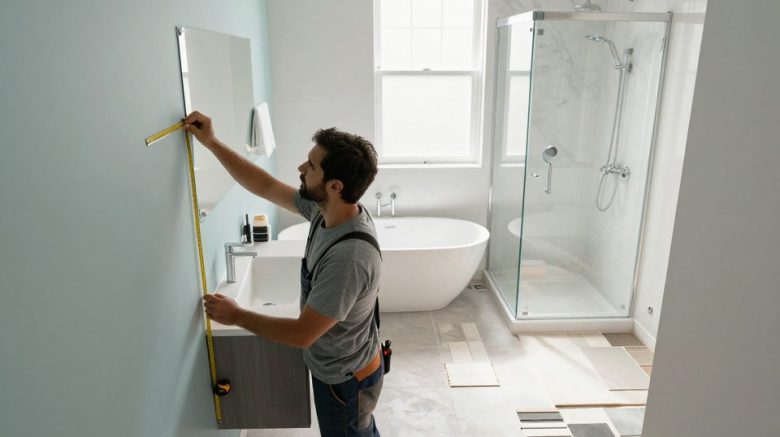
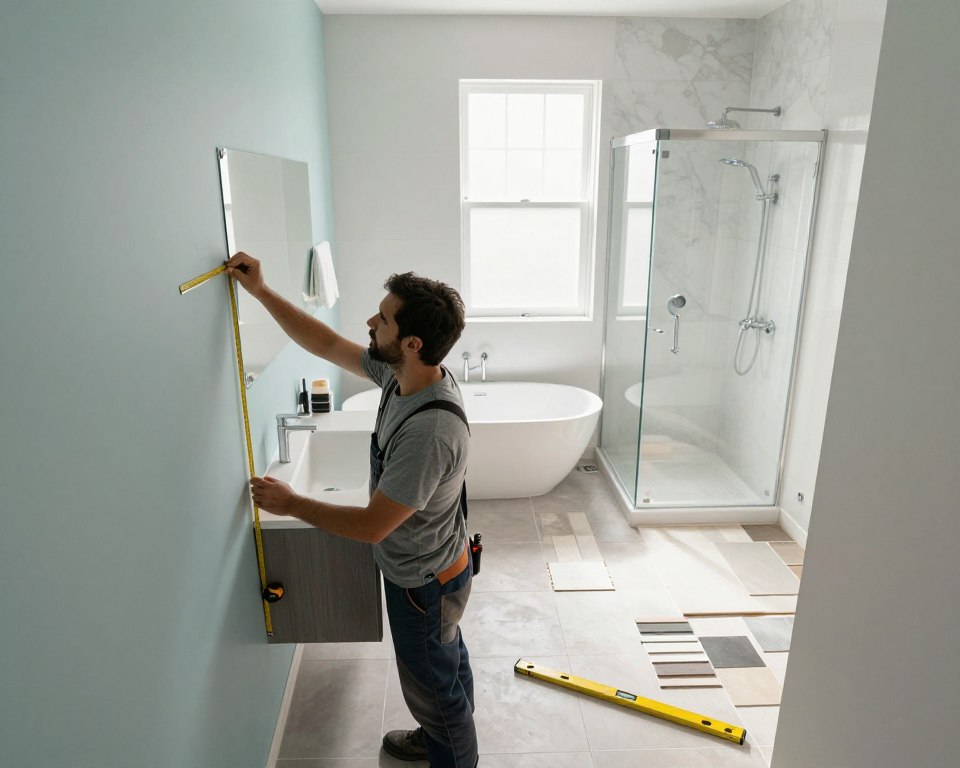
Begin by reviewing the room with a tape measure and annotated photos. Identify water lines, electrical runs, door swings, ceiling angles, and natural light sources such as skylights. This quick survey gives you a clear picture before decisions and bids.
Assess Existing Layout And Feasibility
Take measurements between fixtures and capture photos from multiple viewpoints. Review the position of supply lines and drains behind walls and under flooring. If you are considering major changes, such as replacing a tub with a shower or moving the vanity, ask a contractor to review plumbing access and structural support.
Look for hidden issues such as rot, mold, or joist concerns that affect cost and timeline. In compact bathrooms, plumbing stacks and venting can restrict what can realistically be moved. Determine what can be changed without triggering costly plumbing reroutes.
Determine What To Keep, Replace, Or Relocate
Keep items when moving them costs more than their value. For a lot of projects, not moving the toilet and vanity is one of the easiest ways to save on cost and schedule.
Replace fixtures that are inefficient, damaged, or out of date. Modern, water-saving toilets and low-flow fixtures can cut utility costs and boost appeal.
Only move fixtures after a contractor confirms that the plumbing and electrical changes are feasible. One realistic example is replacing a tub with a walk-in shower and adding cabinetry over a stacked washer/dryer to free up floor area, while leaving the vanity and toilet where they are to avoid relocation expense.
Choose Between DIY And Hiring Professionals
Separate the tasks you can safely do yourself from the ones that require a professional. Doing some of the work yourself can save money on demo, paint, and basic installs. For a moderate project, expect at least a month of work and include a dumpster rental in the budget.
Hire professionals for plumbing, electrical, structural changes, complex tile, and permitting. Good plumbers and tilers often save money by preventing mistakes and redo work. Large-format tile installation and wet-area waterproofing require both accuracy and experience.
If you decide to handle work yourself, gather safety gear, drills, saws, caulking guns, shop vacs, and consider renting tools like a wet-dry vac or tile cutter. A defined scope and timeline will help keep the project from expanding uncontrollably during the remodel.
| Decision Point | DIY Friendly | Best Left To Professionals |
|---|---|---|
| Demolition and debris removal | Yes—if you have safety gear and disposal plan | No—for major structural teardown, hire professionals |
| Moving plumbing lines | No—limit DIY to basic fixture swaps only | Yes—professional work is recommended because permits and code compliance are involved |
| Electrical installation work | No—installing new outlets or circuits not advised | Yes—use a licensed electrician so the work is safe and inspection-ready |
| Tile work | Yes—for basic layouts and limited tile areas | Yes—professional help is best for large-format tile, wet areas, and intricate patterns |
| Painting and trim work | Yes—this is commonly handled as DIY work | No—except when specialty finishes or detailed millwork are involved |
| Tips for small bathroom remodels | Install wall-mounted fixtures and floating vanities | Bring in pros for waterproofing and shower conversion work |
Demolition And Preparing The Space
Begin demolition carefully, with safety and organization as priorities. Begin by shutting off the water, draining the lines, and taking out the toilet to reduce the risk of spills. Wear protective gear like a respirator, gloves, and goggles. A reciprocating saw can help make precise cuts near insulated areas.
Rent an appropriately sized dumpster to keep demolition debris under control and the site organized.
Take out fixtures, mirrors, vanities, and flooring in a logical sequence. Before removing anything, document the room with measurements and photos. Doing this makes later fitting and installation more accurate. Use drop cloths and dust barriers to protect adjacent rooms and floors, reducing cleanup and dust spread.
Safe Practices For Demolition
Begin by isolating utilities and capping lines. Remove the toilet and vanity first to clear the area. Do not aggressively hammer into insulated walls; when possible, cut around studs and fasteners instead. If fixtures will be reused, label and bag them for faster reinstallation.
Inspect And Repair Hidden Damage
Once the finishes are removed, look for mold, rot, and water damage beneath the subfloor and behind the tile. Soft subfloor sections often have to be replaced. Because large-format tile needs a flatter base, use cement board or self-leveling compound where required.
If framing or structural members are damaged, consult a structural contractor or licensed engineer. Fixing studs and headers early helps keep the project moving and avoids delays later during finish work.
Permit Workflow And Inspector Coordination
Permits for electrical, plumbing, or structural work should be in place before rough-in starts. Schedule inspections for plumbing and electrical rough-ins before insulation and drywall. Clear communication with inspectors helps prevent delays that could stop finish work from moving forward.
You may want to hire an experienced contractor to manage permit filings and inspector coordination. Local code knowledge usually helps a contractor move approvals along and keep the remodel progressing.
Prepare for temporary bathroom needs during the renovation period. Try to keep at least one bathroom available in the house or nearby. Temporary solutions can range from a neighboring house to a portable unit during the most disruptive phases.
Use these practices to reduce risk, protect the timeline, and support accurate inspections and repairs. Thoughtful demolition and preparation save time and money, making the project smoother from rough-ins to finishes.
Plumbing, Electrical, And Structural Rough-In Work
Rough-ins for plumbing, electrical, and structure must be completed before walls go up and tile is installed. These foundational elements dictate the layout, impact the cost, and determine the pace of the bathroom remodel. These steps are central to a successful remodel.
Plumbing Factors And Their Effect On Layout
Fixture selection is one of the most important early choices. Choices such as wall-mounted or deck-mounted faucets and single or double vanities affect valve and water-line placement. Installing a shower or converting a tub to a walk-in shower requires accurate drain placement and proper slope verification.
A soaking tub usually requires confirmation that the joists can carry the load. A structural engineer or a licensed contractor may suggest reinforcement or beam replacement to support the tub’s weight.
Electrical Planning And Lighting Upgrades
Plan for additional circuits for fixtures, fans, and heating elements. You may also want smart features such as Lutron Caséta switches or an Echo Dot for convenience and energy savings.
Position outlets near vanities for convenience. Plan task, ambient, and accent lighting zones to reduce glare and eliminate dark spots. Electrical work should always be handled by a licensed electrician, with inspections completed before wall closure.
Structural Work And Subfloor Preparation
Confirm that the subfloor is flat and level before moving forward. A very flat base is especially important when you are using large-format floor tile. To avoid lippage, you may need self-leveling compound or even two layers of cement board.
Any damaged subfloor areas should be replaced, and thresholds should be sealed against water intrusion. Use the proper slopes and finishes so stone surfaces such as quartz countertops are protected from water exposure and etching.
Sequence the work carefully by completing plumbing and electrical rough-ins first, then getting inspections approved. Proceed with insulation, drywall, and tile work. Order your vanity early to align plumbing rough-ins with countertop cut-outs and fixture placements.
Finishes: Tile, Waterproofing, Paint, And Final Fixtures
The finishes you choose strongly affect both the look and performance of the remodel. Begin by selecting tiles in person. Check tiles in natural and artificial light, place them in the intended direction, and review both grout and Schluter® trim choices. Suppliers like Fitzgerald Tile can help match grout color and trim for a cohesive look.
Tile installation requires careful planning. Prepare the substrate, ensuring it’s level and dry. Use cement board where necessary. Consistent thin-set mixing and laser-level checks improve installation accuracy. Use spacers or leveling clips so the joints stay even. Two installers are often the safer choice when handling large tile because control matters more.
Long-term performance depends heavily on good waterproofing. A pan liner beneath the shower-floor mortar and the correct slope to the drain are both essential. Use cement board and a liquid membrane such as RedGard to protect the walls. Position shower controls to avoid cold water while adjusting temperature. Measure for glass enclosures early, as lead times can extend your project.
The space is visually finished with paint and trim after the tile-related work is completed. Use semi-gloss or moisture-resistant paints. Before buying in full, test small samples from retailers such as Lowe’s. A color like Sherwin-Williams Snowbound can create a bright main field, especially when paired with darker trim for contrast. For cleaner edges, use tile trim like Schluter, or select quarter round or baseboard where tile transitions to painted walls.
Select fixtures that align with your design and rough-in constraints. Confirm that Hansgrohe faucets and shower systems match the rough-in positions. Measure twice and compare spec sheets. Brands such as Woodbridge can be solid choices for dependable toilets. For stone thresholds and sills, check Mass Granite or local stone yards for leftover slabs to save on cost.
Useful bathroom renovation reminders include coordinating grout and trim when choosing tile, completing waterproofing ahead of finish work, and confirming dimensions for fixtures early. These actions help prevent callbacks and support a longer-lasting, better-planned bathroom design.
Cabinets, Hardware, And Final Connections
Finish work marks the final stage of the bathroom remodel. This stage includes installing the vanity, placing countertops, fitting storage pieces, and completing the final plumbing and electrical connections. Plan the order carefully so plumbing and electrical work can be completed before cabinets and countertops block access.
Start with the vanity so plumbers have time and access to adjust the piping. Ensure wall-mount faucets are aligned properly. Measure sink layouts and wall clearances carefully. Use preselected quartz or stone slabs for the countertop and confirm the slope so water will not pool or etch the surface.
When installing cabinets, ensure frames are level and anchored to studs. For DIY cabinet work, test-fit the doors and drawers before final fastening. Using a renovation contractor for this step may save time and reduce the risk of costly errors.
Fit storage solutions that match your needs and scale. Built-ins, floating shelves, and cabinetry above a washer can help maximize the available space. Coordinate medicine cabinets and mirrors—such as the Pillar-30 by Blossom—so the room feels cohesive. Smart features such as Lutron Caséta switches and Echo Dot speakers can also be added for integrated control.
Put in the fixtures and glass only after the tile, trim, and flooring have fully cured. Schedule the glass shower enclosure after grout and trims are complete. Be aware of lead times for custom glass and plan temporary shower solutions if necessary.
Install shower doors, seals, and grab bars carefully so leaks are avoided. Use manufacturer torque specs and sealed fasteners where required. Check that sliding or swinging doors operate smoothly and have even clearances.
After tile installation, grout should be applied and sealed whenever the specification requires it. Use color-matched grout for seamless visuals. Use the proper silicone sealant at all transitions between trim, fixtures, and tile to help block water.
Give every product its full cure time before the surfaces are exposed to water. Following the manufacturer’s cure instructions for silicone and grout sealer helps preserve both the finish and any warranty coverage.
Walk through the space with your contractor to create a punch list of touch-ups such as grout correction, paint spots, or trim alignment. Final sign-offs for plumbing and electrical should be completed before the bathroom is considered ready.
Verify the warranties for both workmanship and fixtures, and get maintenance guidance for quartz and grout. Finish styling with bath rugs, greenery like a peace lily, and coordinated accessories from retailers such as Crate & Barrel, Amazon, or Wayfair to complete your bathroom makeover.
Final Thoughts
Embarking on a bathroom remodel requires clear planning and a realistic design. Begin by setting goals and sketching layouts before purchasing materials. Your budget should always include a contingency for surprise expenses. Making style and scope decisions early helps streamline the project and improves cost estimating.
Check feasibility and permit requirements before you start demolition. Inspect hidden systems during teardown and schedule rough-ins for plumbing, electrical, and structural work. Experienced help from a licensed contractor or a firm like Renovate Builders often helps prevent expensive errors. It also helps ensure that all trades, including tile and structural crews, meet code and inspector expectations.
Prioritize durable finishes and careful timing. To avoid schedule problems, order vanities, custom stone, and glass early. Prioritize waterproofing, precise tile prep, and proper sealing for lasting results. A strong sequence is demolition and inspections first, then rough-ins, then waterproofing and tile, and finally the last installations and inspections.
Let this guide help shape your timeline and budget. Visit showrooms to select materials in person and consult a licensed contractor for permit needs and structural assessments. Following these steps can help control costs while leading to a bathroom that is safe, functional, and attractive.